Contents of your kit
1x ready mossed, wire wreath base
1x reel binding wire
8x Floral stub wires
1x quantity assorted foliages (enough to cover wreath base)
1x wire edge ribbon
1x quantity cones
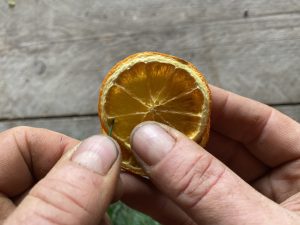
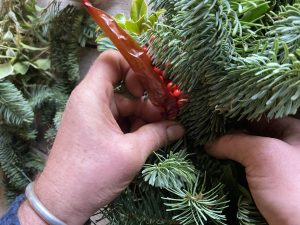
1x quantity dried decorations some of these may have long enough stems to bind into the wreath base alongside then fresh foliage its only the shorter stemmed or stem less decorations you need to set aside for wiring.
Please store in cool vermin proof place prior to use but please use within 1 day of receipt. An out house/ garage/ shed etc is ideal, the colder the better!
The quantity of foliages provided within this box, when used correctly, should be sufficient to create your wreath fully. If you wish to make your wreath completely unique, you may wish to add further foliages/ twigs in addition to those provided. So feel free to cut further items from your gardens etc, to enhance your designs and have them cut to length (approx 12-15 cm, or longer if you want to create some looseness to your design) ready to use before starting to assemble.
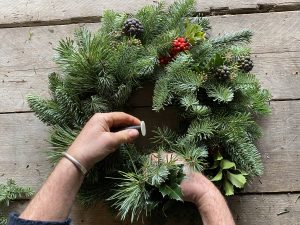
Step 1
Lay out all of the foliages you are using, in piles of their type, out on a workbench/table in front of you, so they can be easily reached. You will find some are the same type but larger or smaller in their size, lay these out separately in their size group and aim to distribute them evenly around the wreath base as you apply.
**Tip**
Use the larger sized pieces of foliage to define the outside edge of the wreath, with the smaller pieces laid on to cover the middle/top of the moss frame.
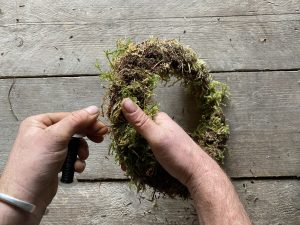
Immediately in front of you position the roll of binding wire and the mossed wreath base so it appears dome shaped rather than dish shaped. It has been packed the correct way up for use in the box, so this should help.
Position, for now, all the decorations/ ribbon and stub wires to one side for use later.
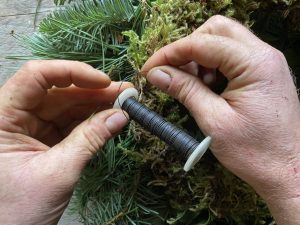
Step 2
Attach the binding wire to the outside edge of the mossed wire frame, making sure when you tug the roll of wire it doesn’t unwind or come loose. You don’t want everything to unravel after you’ve bound it all on. Take care to position the mossed ring back in front of you the correct way up and you should now have the roll of wire attached to it and laying to the outside of the wreath base.

To ensure the easiest way to bind the foliage onto the wreath always work holding the foliage, pointing the right direction, against the moss base and bind over the top of the stem part to be secured and into the middle (the hole) of the wreath.
Step 3
Select a good fan shaped, larger, piece of pine as your first foliage to apply, this will help at the end when you bind the last pieces on. If you use a prickly foliage at this point it will make it very painful for yourself when you come to finish all of the foliage binding and tie off your binding wire!
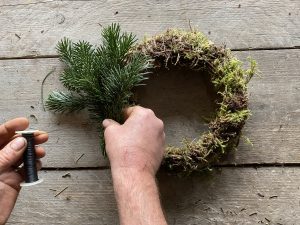
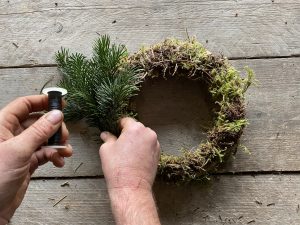
Keep binding on foliages one by one, using a different type each time and make sure you are taking care to create the wreath evenly all the way round and covering the moss base as you go. Always lay the next piece of foliage to be applied on top of the previous piece, ensuring that you’re seeing the completed section moving away from you as you apply the next pieces of foliage to the wreath base. Aim to bind on a different variety of foliage each time you apply a piece.

Once around 5 pieces of foliage have been applied, take stock, look at the sequence you have created and then to ensure an evenly round wreath try to apply the next pieces in the same sequence. (Sometimes the actual shape of the individual pieces of foliage may hinder this to maintain the even shape of your wreath, so use your own judgement here, to keep things looking neat and even.) Keep repeating the sequence until you have reached as close as possible to where you started and we mean close, don’t give up until you have the last pieces of foliage about to have their stalks butted beneath the first pieces of foliage applied (See step 4)
**TIP**
Work around the wreath base applying slowly and steadily, binding each piece of foliage individually. You are aiming for all of the foliage to be applied upon one rotation of the wreath base. You can’t bind round a second rotation without snagging pieces already applied (should you need to fill in any gaps) so care need to be taken at this stage.
DON’T RUSH IT!!!
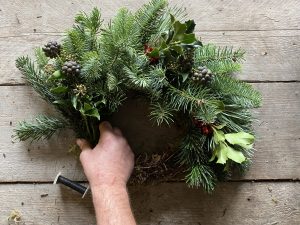
Step 4
Finish binding on the last pieces of, making sure where the point of binding is it is covered sufficiently by the first piece of foliage attached. (This is why you needed to start with a softer type of foliage!) Lift the first piece of foliage up like a flap ensuring the stalks of the last pieces of foliage are tucked well beneath before binding on with the wire.
Step 5
Secure the binding wire by creating a slip knot to pull tight, make sure this is pulled tight enough to ensure no pieces of foliage come loose from the base. Once all secure, cut the binding wire leaving 2” (5cm) of end to push back into the moss on the base to make safe and ensure you don’t stab yourself with sharp wire ends.
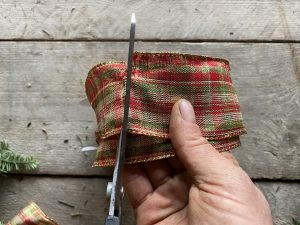
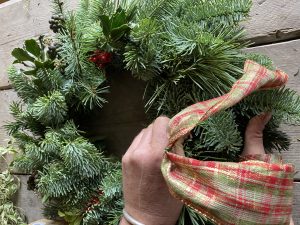
Step 6 Making the bow.
Wired edge ribbon is the easiest way of creating a bow for it to hang nicely and keep its shape whilst on the door exposed to the elements.
You can either tie as you would your shoelaces then thread one of the stub wires through the back of the knot created and use this wire ‘stalk’ to push through all of the foliage and mossed wire base and fix securely by pulling wire and then bending the end back into the moss.
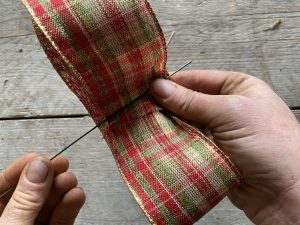
Alternatively, the florist wreath bow, (made in two pieces)
Cut one piece of ribbon approx 45 cm (18”) long fold in half and attach to a stub sire stalk by bending the wire over the ribbon at the fold and twisting the wire back on itself to secure. This piece will create the tails of the bow, so to make look better enhance the cut ends either by cutting them on the diagonal or creating an inverted V shaped notch.
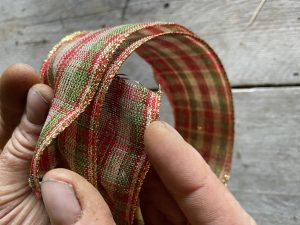
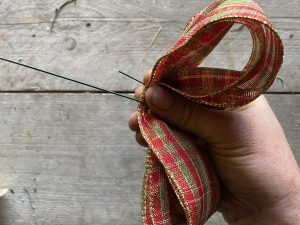
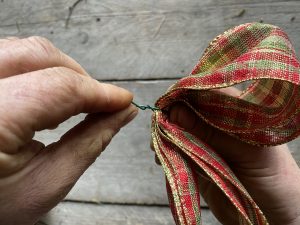
With the remainder of the ribbon, roll it into a large ‘double round’ with 2 rotations of ribbon, ensure the cut ends of the ribbon visually overlap each other, one appearing on the inside of the roll and one on the outside. Directly at the mid point of where the ends overlap create a fold, on this fold use a stub wire to wrap around the ribbon and twist back on itself to secure. You will need to scrunch the ribbon on the fold up the wire to compress the fold as much as possible. This will keep what are about become the ’loops’ of the bow and they won’t spring apart when you then ‘fluff’ the bow out to assume it’s true shape. Creating what looks like two loops each side of the securing stub wire. See the picture on our webshop to see the desired look of the bow.
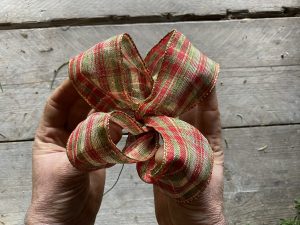
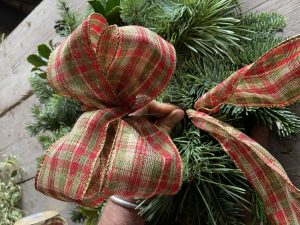
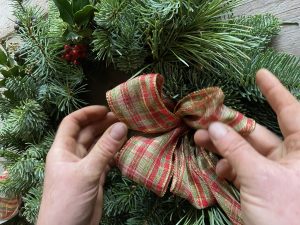
Attach the tails of the bow first into the wreath, as described above. Then push the wire of the bow loops into the exact same place the tail were attached. Pull the wire to make sure the bow sits securely in the wreath, then ‘fluff’ as required to look its best.
Ta da!!! One posh bow!!
Using the Ribbon as Trails only.
If the bow scares you and you wish to just have trailing ribbons instead (as some of our designs do show on the webshop) please ensure you have/cut the ribbon into 2 pieces at approx 75cm in length, fold in half but ensure all of the cut ends are offset from each other at least 2” (5 cm) so they hang any different heights. Notch the cut ends with an inverted ‘V’ or cut at a 45 degree angle. At the fold twist a stub wire around this point to create a stalk and push through the foliages and wreath place in the desired place to attach, making sure to bend over the pulled through wire and bury back into the moss base at the back of the wreath.
Step 7
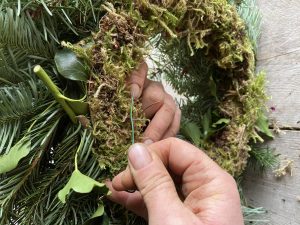
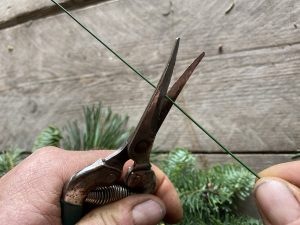
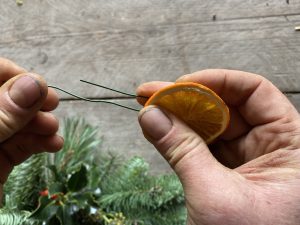
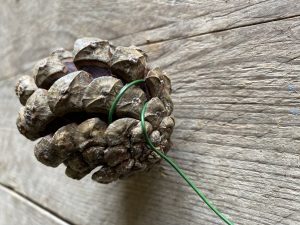
Cones and dried decorations are attached in the same way as the bow using a stub wire by either threading the wire through or wrapping around the items concerned and twisting the wire back on itself, to create a wire stalk to attach them with. Smaller decorations (not Cones) will only require half a length of stub wire, so cut to length first before using.


Alternatively if you have a hot melt glue gun, the smaller decorative items can easily be attached this way.
**Tip**
Always attach your bow first and then your other decorations. Otherwise you find the bow will end up covering over smaller decorative items and you will not be able to see them once on your door. Make sure each of the smaller decorative items are positioned and attached to have their place to shine!
Step 8
Create a wire loop on the back of the wreath to enable hanging on the door. Feed a stub sire through the outside rear edge of the mossed base, placing the loop in the favoured position to ensure the wreath hangs correctly. Make sure the wire catches underneath the thicker wire edged rim of the moss frame. Create a loop by twisting the stub wire ends together.
Step 9
Prior to hanging, water the moss base to keep the foliage fresh for as long as possible. Do this by laying the whole wreath moss side down in 2cm (1”) depth of water held in a tray or upturned dustbin lid. Leave to soak for 10mins the allow to drain on a lawn/ paved area for 20 mins before hanging.
Step 10
Hang on your door or other preferred area (best outdoors for longevity) and enjoy!!


Lastly
Have a lovely Christmas and thank you for your support and we look forward to a better 2021 for everyone!!………
Best wishes from us all at The Country Garden Flower Company